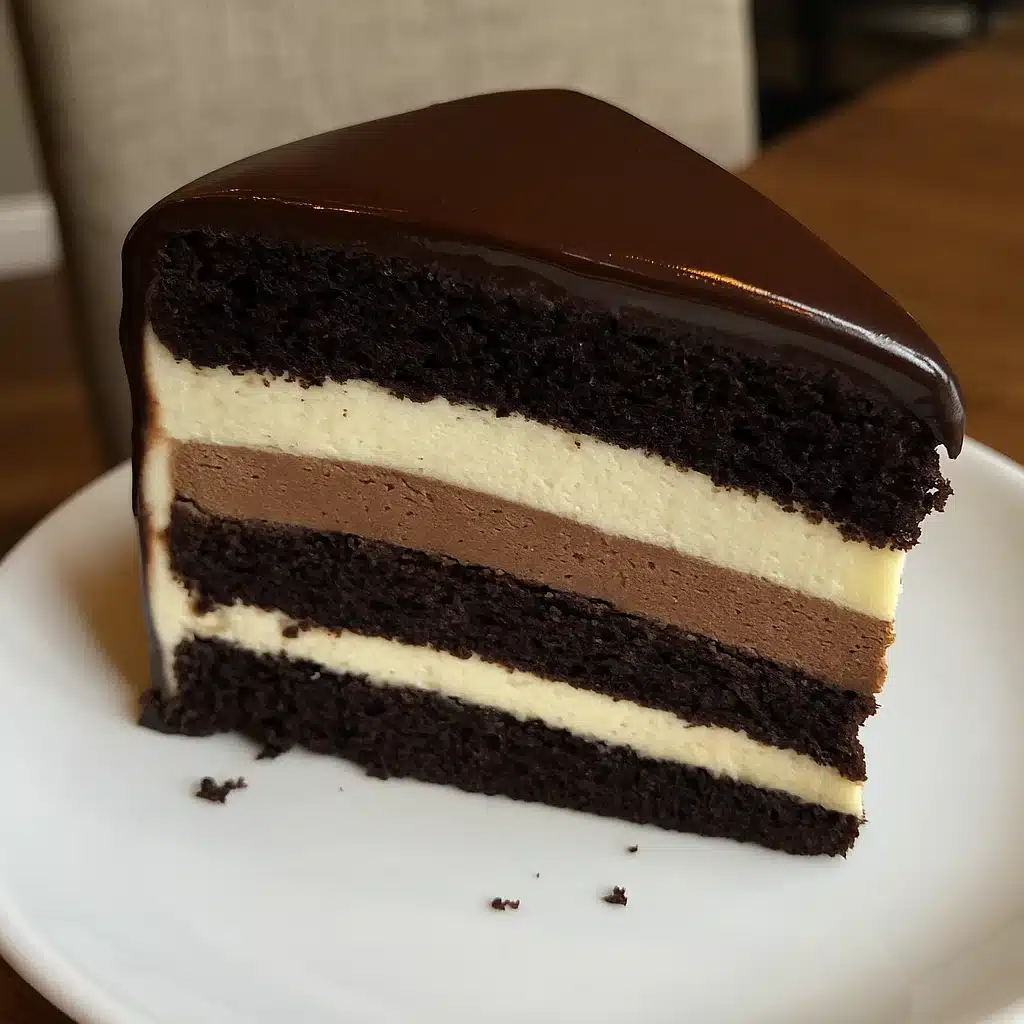
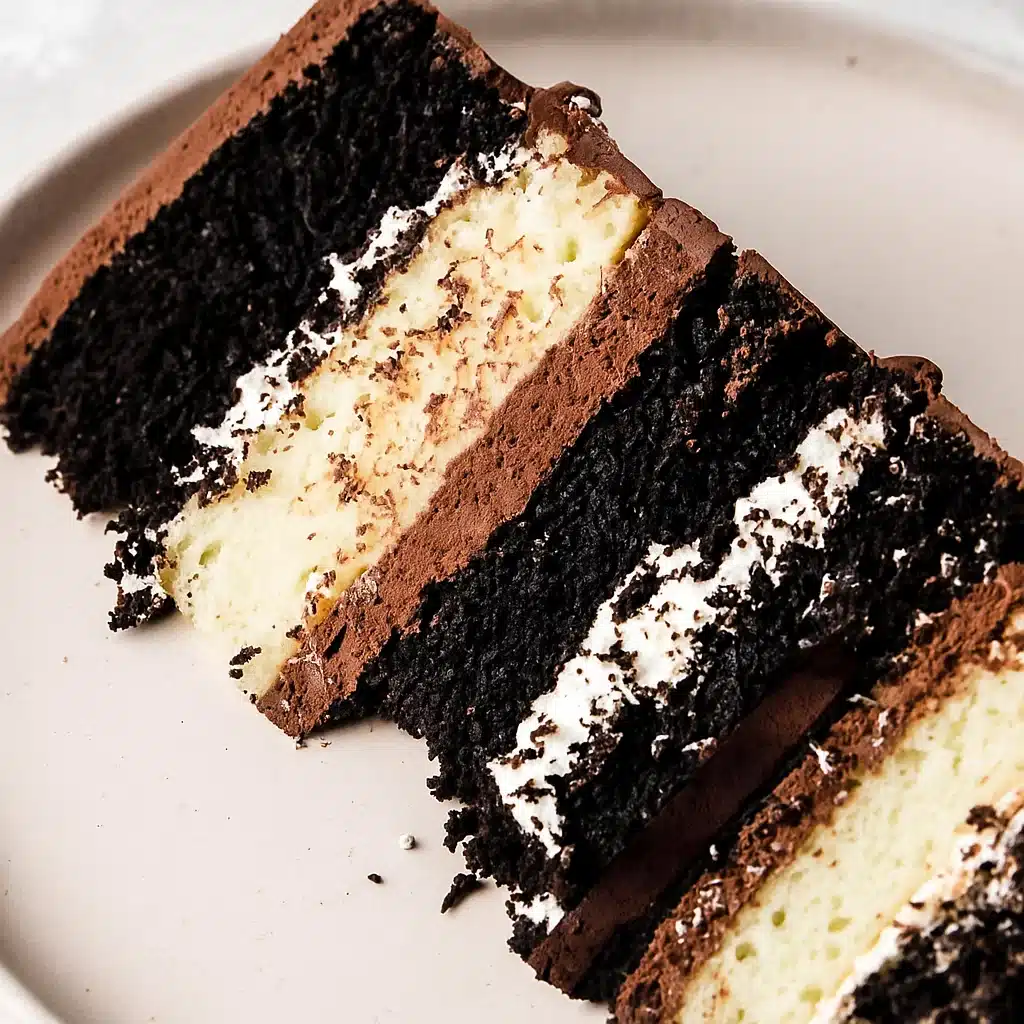
Chocolate Tuxedo Cake is pure elegance meets homestyle comfort – and trust me, it’s easier than you think! This stunning dessert layers rich dark chocolate cake with silky dark and white chocolate mousses, all wrapped up in a glossy ganache frosting that’ll have your guests thinking you ordered it from the fanciest bakery in town.

Why You’ll Love This Recipe
- Show-stopping presentation – The contrast between dark and white chocolate mousse creates that classic “tuxedo” look that’s absolutely gorgeous
- Make-ahead friendly – Perfect for entertaining since you can prep components days in advance
- Rich but not overwhelming – The airy mousse layers balance the decadent chocolate cake beautifully
- Impressive yet doable – Looks like you went to pastry school, but uses techniques any home baker can master
Ingredients You’ll Need
Dark & White Chocolate Mousse Filling:
- ½ cup (4 oz) dark chocolate chips (get the good stuff, trust me)
- ⅓ cup warm water
- ¼ cup dark cocoa powder (Hershey’s Special Dark is fine)
- ¾ cup white chocolate chips (don’t cheap out here either)
- ⅓ cup heavy cream
- 2⅓ cups cold heavy whipping cream (keep it cold!)
- ¼ cup powdered sugar
- 2 teaspoons vanilla extract
- ½ teaspoon fine salt (seriously, don’t skip this)
Chocolate Ganache Frosting:
- ¾ cup heavy whipping cream
- 1 cup + 1 tablespoon dark chocolate chips
- 2 tablespoons unsalted butter, room temperature
- 1 tablespoon light corn syrup (makes it super shiny)
- ¼ teaspoon fine salt
Dark Chocolate Cake Layers:
- 2½ cups granulated sugar
- 2¼ cups all-purpose flour
- ¾ cup dark cocoa powder
- 2½ teaspoons baking powder
- 1 teaspoon fine salt
- 1 cup unsalted butter, room temperature
- 1 cup egg whites (the carton kind works great)
- 1½ cups buttermilk (this is the magic ingredient)
- 2 tablespoons vegetable oil
- 2 teaspoons vanilla extract
- 1 teaspoon instant coffee (whatever you have is fine)
Chocolate Simple Syrup:
- ½ cup water
- ½ cup granulated sugar
- 1 tablespoon unsweetened cocoa powder

Chocolate Tuxedo Cake
- Total Time: 3 hours 25 minutes
- Yield: 1 large cake 1x
Description
An impressive three-layer chocolate dessert featuring moist dark chocolate cake layered with homemade dark and white chocolate mousses and topped with rich chocolate ganache. Perfect for special occasions and entertaining.
Ingredients
Dark & White Chocolate Mousse Filling:
- ½ cup (4 oz) dark chocolate chips (get the good stuff, trust me)
- ⅓ cup warm water
- ¼ cup dark cocoa powder (Hershey’s Special Dark is fine)
- ¾ cup white chocolate chips (don’t cheap out here either)
- ⅓ cup heavy cream
- 2⅓ cups cold heavy whipping cream (keep it cold!)
- ¼ cup powdered sugar
- 2 teaspoons vanilla extract
- ½ teaspoon fine salt (seriously, don’t skip this)
Chocolate Ganache Frosting:
- ¾ cup heavy whipping cream
- 1 cup + 1 tablespoon dark chocolate chips
- 2 tablespoons unsalted butter, room temperature
- 1 tablespoon light corn syrup (makes it super shiny)
- ¼ teaspoon fine salt
Dark Chocolate Cake Layers:
- 2½ cups granulated sugar
- 2¼ cups all-purpose flour
- ¾ cup dark cocoa powder
- 2½ teaspoons baking powder
- 1 teaspoon fine salt
- 1 cup unsalted butter, room temperature
- 1 cup egg whites (the carton kind works great)
- 1½ cups buttermilk (this is the magic ingredient)
- 2 tablespoons vegetable oil
- 2 teaspoons vanilla extract
- 1 teaspoon instant coffee (whatever you have is fine)
Chocolate Simple Syrup:
- ½ cup water
- ½ cup granulated sugar
- 1 tablespoon unsweetened cocoa powder
Instructions
Toss your mixing bowl and beaters in the freezer right now. Cold everything is what makes cream actually whip instead of just getting tired.
Pro Tip: Learned this when my stand mixer broke on Easter Sunday and I had to use a hand mixer. Cold bowls saved my arms from falling off.
Melt your chocolate chips slow and easy – microwave in 20-30 second chunks or use a double boiler if you’re fancy. Don’t rush or you’ll get chocolate cement. In another bowl, whisk that warm water and cocoa until it’s smooth, then mix into melted chocolate. Let it cool down.
White chocolate is a drama queen and burns if you breathe on it wrong. Melt it with the cream super slowly, stirring the whole time. Should end up smooth and creamy. If it gets grainy, you moved too fast.
Get that cold bowl and whip 2 cups cream with powdered sugar, vanilla, and salt until you see soft peaks. Takes maybe 3 minutes with a good mixer. Stop at soft peaks or you’re making butter.
Split the whipped cream between two bowls. Fold the cooled dark chocolate into one, white chocolate into the other. Fold means gentle scooping with a rubber spatula, not beating the life out of it. Cover and stick in fridge for 2 hours minimum.
Pro Tip: My grandma used to say fold like you’re putting a baby to sleep. Took me years to understand what she meant, but gentle is everything here.
Heat that cream until it bubbles around the edges. Pour over chocolate chips and count to sixty – set a timer because I always cheat. Stir from center out until glossy. Add butter, corn syrup, salt. Cover with plastic wrap right on the surface so it doesn’t get a weird skin.
Oven to 350°F, grease your pans good. Mix dry stuff first, then work in room temp butter until it looks like wet sand. Gently stir in egg whites, then buttermilk in two parts. Add oil, vanilla, coffee last.
Pour into pans, bake 40-45 minutes for big pan, 34-37 for rounds. Done when toothpick has some moist crumbs, not totally clean. Don’t overbake or it gets dry.
Pro Tip: Cool for 10 minutes then freeze for 30. Learned this after destroying two cakes trying to level them warm. Cold cake actually cooperates with knives.
Boil water and sugar, take off heat, whisk in cocoa. Keeps cake moist and adds more chocolate flavor. Don’t skip this step.
Dab ganache on plate to stick first layer. Brush with syrup, spread dark mousse, then white mousse. Second layer, more syrup, press gently. Chill 15 minutes, then ganache on top.
Notes
Good chocolate costs more but cheap stuff tastes like wax crayons. Keep bowls in freezer all the time because cold cream whips better. When folding mousse, stop the second it looks combined – don’t keep stirring just because.
Ganache too thick? Ten seconds in microwave. Too thin? Fifteen minutes in fridge. Should spread like frosting, not pour like syrup. Cold ingredients make assembly easier so don’t rush the chilling steps.
- Prep Time: 30 minutes
- Cook Time: 45 minutes + 2 hours 30 minutes (chilling/assembly)
- Category: Dessert
- Method: Baking
- Cuisine: American
Nutrition
- Serving Size: 1 slice
- Calories: 466
- Sugar: 38g
- Sodium: 285mg
- Fat: 28g
- Saturated Fat: 17g
- Unsaturated Fat: 9g
- Trans Fat: 0g
- Carbohydrates: 52g
- Fiber: 4g
- Protein: 6g
- Cholesterol: 65mg
Why These Ingredients Work
So I thought mousse was this impossible French thing that required years of culinary school. Turns out it’s just chocolate and whipped cream that don’t hate each other. The secret is temperature – everything has to be buddies or it turns into a chocolate disaster.
I used whole eggs the first three times and got cake so dense I could’ve used it as a doorstop. My sister suggested egg whites and suddenly everything was fluffy instead of concrete. The whites make the cake light so you can actually taste those gorgeous mousse layers.
Buttermilk came from my neighbor who watched me fail twice through the kitchen window. She brought over a cup and said “try this instead of regular milk.” Game changer. Makes everything tender and adds this tiny tang that keeps all the chocolate from being too much.
Essential Tools and Equipment
- Stand mixer or hand mixer with whisk attachments
- Two mixing bowls that can chill in the freezer
- 9×13-inch baking pan or two 9-inch round pans
- Double boiler or microwave-safe bowls for melting chocolate
- Wire cooling racks
- Offset spatula for spreading
- Sharp serrated knife for leveling
- Plastic wrap
- Cake board or serving plate
Step-by-Step Instructions
Step 1: Prep Your Mousse Setup
Toss your mixing bowl and beaters in the freezer right now. Cold everything is what makes cream actually whip instead of just getting tired.
Pro Tip: Learned this when my stand mixer broke on Easter Sunday and I had to use a hand mixer. Cold bowls saved my arms from falling off.
Step 2: Make the Dark Chocolate Base
Melt your chocolate chips slow and easy – microwave in 20-30 second chunks or use a double boiler if you’re fancy. Don’t rush or you’ll get chocolate cement. In another bowl, whisk that warm water and cocoa until it’s smooth, then mix into melted chocolate. Let it cool down.
Step 3: Prepare the White Chocolate Mixture
White chocolate is a drama queen and burns if you breathe on it wrong. Melt it with the cream super slowly, stirring the whole time. Should end up smooth and creamy. If it gets grainy, you moved too fast.
Step 4: Whip the Cream
Get that cold bowl and whip 2 cups cream with powdered sugar, vanilla, and salt until you see soft peaks. Takes maybe 3 minutes with a good mixer. Stop at soft peaks or you’re making butter.
Step 5: Create Your Mousses
Split the whipped cream between two bowls. Fold the cooled dark chocolate into one, white chocolate into the other. Fold means gentle scooping with a rubber spatula, not beating the life out of it. Cover and stick in fridge for 2 hours minimum.
Pro Tip: My grandma used to say fold like you’re putting a baby to sleep. Took me years to understand what she meant, but gentle is everything here.
Step 6: Make the Ganache
Heat that cream until it bubbles around the edges. Pour over chocolate chips and count to sixty – set a timer because I always cheat. Stir from center out until glossy. Add butter, corn syrup, salt. Cover with plastic wrap right on the surface so it doesn’t get a weird skin.
Step 7: Prepare Your Cake Layers
Oven to 350°F, grease your pans good. Mix dry stuff first, then work in room temp butter until it looks like wet sand. Gently stir in egg whites, then buttermilk in two parts. Add oil, vanilla, coffee last.
Step 8: Bake the Cake
Pour into pans, bake 40-45 minutes for big pan, 34-37 for rounds. Done when toothpick has some moist crumbs, not totally clean. Don’t overbake or it gets dry.
Pro Tip: Cool for 10 minutes then freeze for 30. Learned this after destroying two cakes trying to level them warm. Cold cake actually cooperates with knives.
Step 9: Make Simple Syrup
Boil water and sugar, take off heat, whisk in cocoa. Keeps cake moist and adds more chocolate flavor. Don’t skip this step.
Step 10: Assembly Time
Dab ganache on plate to stick first layer. Brush with syrup, spread dark mousse, then white mousse. Second layer, more syrup, press gently. Chill 15 minutes, then ganache on top.

You Must Know
Your mousse will turn to soup if that chocolate is even warm when you fold it. Ruined Christmas Eve dessert learning this lesson. Everything needs to cool completely or it’s game over.
Room temp butter isn’t optional – cold butter will destroy your mixer and make lumpy batter that bakes weird. I set mine on top of the fridge while oven heats up. Bread knife for leveling cake layers was my breakthrough moment. Regular knives squish everything, serrated cuts clean.
Pro Tips & Cooking Hacks
Good chocolate costs more but cheap stuff tastes like wax crayons. Keep bowls in freezer all the time because cold cream whips better. When folding mousse, stop the second it looks combined – don’t keep stirring just because.
Ganache too thick? Ten seconds in microwave. Too thin? Fifteen minutes in fridge. Should spread like frosting, not pour like syrup. Cold ingredients make assembly easier so don’t rush the chilling steps.
Flavor Variations & Suggestions
My cousin adds raspberry jam to white mousse and thinks she invented something. Actually tastes pretty good. For holidays I crush peppermints into white layer – kids go nuts. Coffee people can brush layers with actual coffee instead of syrup.
Orange zest in white mousse tastes expensive for no extra work. Made triple chocolate version last month with milk chocolate mousse – complete chocolate overload but some people live for that. Same method, just swap chocolates.
Make-Ahead Options
This cake gets better sitting around like it needs time to think about life. Bake layers Sunday, they’re perfect Wednesday. Mousses keep two days easy in fridge, saves stress when people are coming over.
Ganache lasts a week in fridge, just warm it up before using. Whole cake can sit overnight and tastes even better next day. Flavors become friends instead of strangers living together.

What to Serve With Chocolate Tuxedo Cake
Strong coffee cuts through richness perfectly. Kids need milk or they’ll be sugar crazy. Wine people like port or something red that makes them feel fancy. Strawberries add color and cut sweetness.
Vanilla ice cream works but don’t put it directly on cake or everything melts into chocolate soup. Learned that at my daughter’s birthday party.
Allergy Information
Has dairy, eggs, wheat, probably soy depending on chocolate brand. Dairy-free people can try coconut cream but texture won’t be same. Gluten-free flour substitutes okay. Egg replacers might work but can’t promise results.
Check chocolate labels – every brand warns about different stuff depending on their factory setup. Some have nuts, some don’t, some make everything on same equipment.
Storage & Reheating
Fridge up to three days covered, though mine never lasts that long. Serve cold but let it sit 30 minutes before cutting or knife drags. Don’t leave out too long or mousse gets soft.
Slices freeze great wrapped tight, up to a month. Thaw overnight in fridge – room temp thawing makes everything sweaty and gross.
Emily’s Kitchen Secret: Overnight rest isn’t laziness – this cake completely changes after a full night in fridge. Layers settle, flavors deepen, everything becomes more luxurious. Done side-by-side tests and day-old version wins every single time. Plan ahead if possible, your patience pays off with bakery-quality results from your regular kitchen.
FAQs
Can I use milk chocolate instead of dark?
Yeah but cut sugar in mousse by a tablespoon since milk chocolate is sweeter already. Whole thing will be milder, more kid-friendly.
My mousse looks like chocolate water – help?
Chocolate was too hot when you folded it, or cream got overwhipped first. Everything room temperature, stop whipping at soft peaks.
No stand mixer, can I still make this?
Hand mixer works but your arm will be sore. Keep everything extra cold and have patience. Tastes exactly the same.
How do I get bakery-style clean slices?
Warm knife dipped in hot water, wipe between cuts. Warm blade slides through cold mousse instead of dragging.
Do I really need that syrup?
Coffee works, fruit juice works, or skip entirely. Cake will be slightly less moist but still delicious. Don’t stress about it.
💬 Tried making this? Let me know how it went! Leave a comment and share pics – I love seeing everyone’s versions and hearing about kitchen adventures gone right or wrong!

