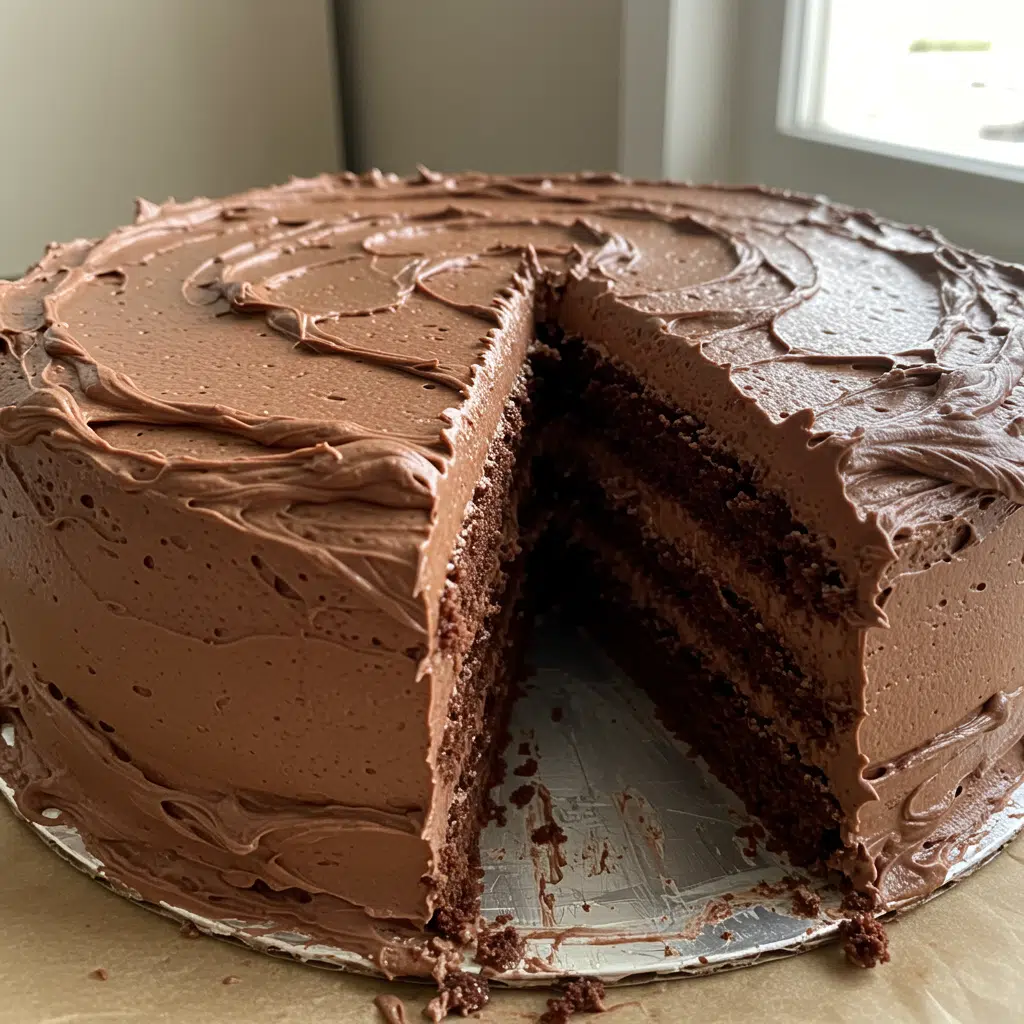
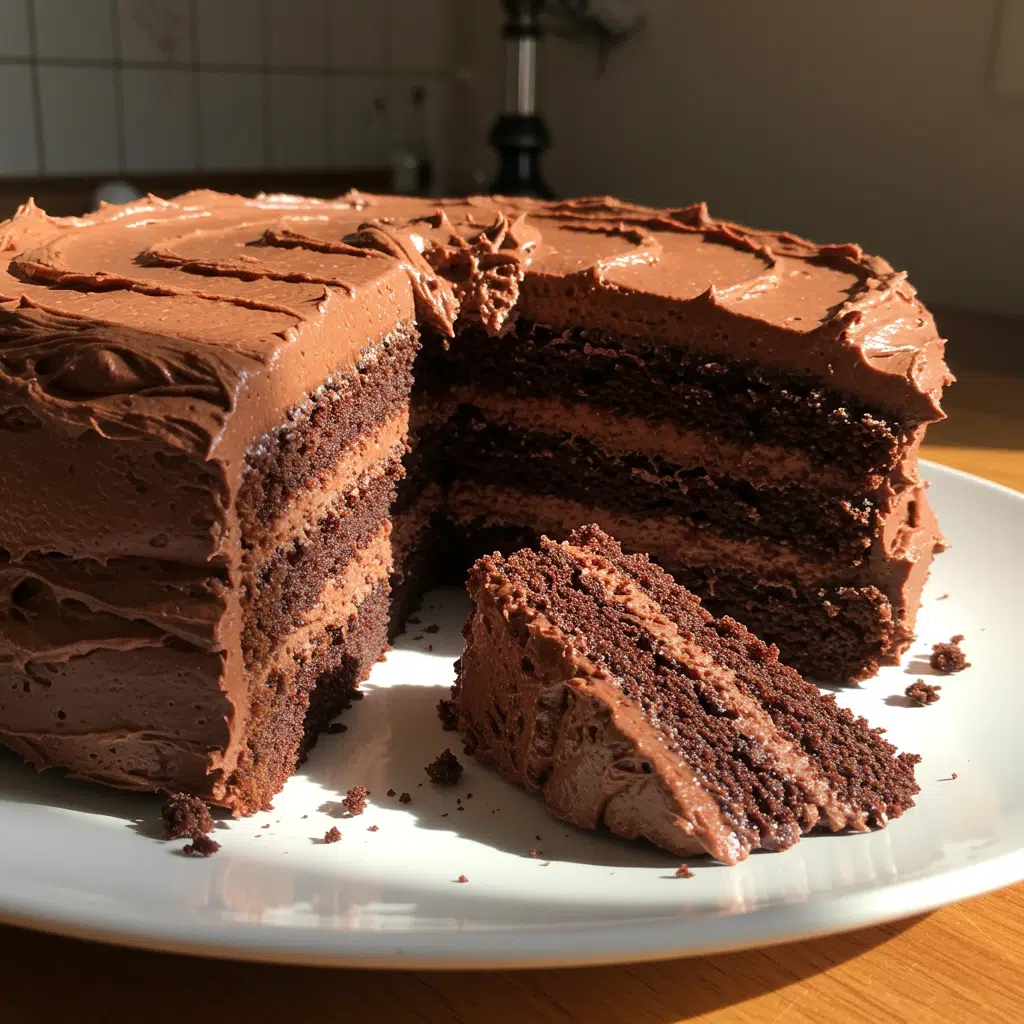
Chocolate cake is the kind of dessert that brings families together and creates memories that last a lifetime! It’s incredibly moist, perfectly chocolatey, and topped with the most luxurious buttercream frosting you’ve ever tasted. With simple pantry ingredients and foolproof instructions.

Why You’ll Love This Recipe
- Incredibly moist and tender – The secret boiling water technique creates the most amazing texture
- Deep, rich chocolate flavor – Enhanced with a touch of espresso powder that makes the chocolate sing
- Foolproof and forgiving – Perfect for both beginner and experienced bakers
- Made with pantry staples – No fancy ingredients or trips to specialty stores required
- Versatile and customizable – Easily adapt for dietary needs or flavor preferences
Ingredients You’ll Need
For the Cake:
- 2 cups all-purpose flour
- 2 cups granulated sugar
- ¾ cup unsweetened cocoa powder (get the good stuff, seriously)
- 2 teaspoons baking powder
- 1½ teaspoons baking soda
- 1 teaspoon kosher salt
- 1 teaspoon espresso powder (this is the magic)
- 1 cup milk (whatever kind you drink is fine)
- ½ cup vegetable oil (coconut oil works too)
- 2 large eggs (I forget to take them out early, room temp is nice but not required)
- 2 teaspoons vanilla extract
- 1 cup boiling water (yes, really boiling)
For the Chocolate Buttercream Frosting:
- 1 cup unsalted butter, softened (set it out when you start mixing)
- 3½ cups powdered sugar
- ½ cup unsweetened cocoa powder
- ½ teaspoon kosher salt
- 2 teaspoons vanilla extract
- ¼ cup heavy cream (add more if it’s too thick)

Easy Chocolate Cake
- Total Time: 45 minutes
- Yield: 24 slices 1x
Description
Super moist chocolate cake made with a surprising hot water technique. Rich chocolate flavor, easy buttercream frosting, and uses ingredients you already have.
Ingredients
For the Cake:
- 2 cups all-purpose flour
- 2 cups granulated sugar
- ¾ cup unsweetened cocoa powder (get the good stuff, seriously)
- 2 teaspoons baking powder
- 1½ teaspoons baking soda
- 1 teaspoon kosher salt
- 1 teaspoon espresso powder (this is the magic)
- 1 cup milk (whatever kind you drink is fine)
- ½ cup vegetable oil (coconut oil works too)
- 2 large eggs (I forget to take them out early, room temp is nice but not required)
- 2 teaspoons vanilla extract
- 1 cup boiling water (yes, really boiling)
For the Chocolate Buttercream Frosting:
- 1 cup unsalted butter, softened (set it out when you start mixing)
- 3½ cups powdered sugar
- ½ cup unsweetened cocoa powder
- ½ teaspoon kosher salt
- 2 teaspoons vanilla extract
- ¼ cup heavy cream
Instructions
Turn your oven to 350°F. Grease your pans with whatever you use – I like butter, then I dust them with cocoa instead of flour so they don’t look all white and weird.
Dump all the dry stuff in your biggest bowl and whisk it up. Make sure there aren’t any cocoa lumps because those turn into bitter surprises later.
Pro Tip: Taste your cocoa before you use it. Old cocoa tastes like dirt and will ruin your whole cake.
Pour in the milk, oil, eggs, and vanilla. Mix it on medium until it looks like normal cake batter. Nothing fancy here.
This is where it gets weird. Turn your mixer down low and slowly pour in that boiling water. The batter’s going to get really thin and you’re going to think you screwed up. You didn’t.
Pro Tip: Go slow with the water so you don’t make scrambled eggs. Keep that mixer running the whole time.
Split the batter between your pans – it’ll be really liquidy, that’s normal. Bake for about 30-35 minutes. Stick a toothpick in the middle and if it comes out clean or with just a few crumbs, you’re done.
Let them sit for 10 minutes, then flip them out onto racks. I know you want to frost them now but don’t. Hot cake melts frosting and you’ll hate yourself.
Beat your butter until it’s fluffy, then add everything else and beat the crap out of it until it’s smooth. If it’s too thick, add more cream. Too runny? More powdered sugar.
Bottom layer on your plate, frosting in the middle, top layer, then frost the whole thing. Don’t stress about making it perfect – homemade should look homemade.
Notes
Here’s what I wish someone had told me when I started making this cake. That espresso powder isn’t optional – it makes chocolate taste more like itself without adding coffee flavor. When you measure cocoa, don’t pack it down or you’ll get way too much and your cake will be bitter as hell.
Also, smell your vanilla before you use it. Cheap vanilla tastes like rubbing alcohol and will mess up your whole cake. If your frosting looks too thick, add cream bit by bit. If it gets too thin, stick it in the fridge for a few minutes then beat it again. And here’s something nobody tells you – check doneness in the center, not the edges. Edges always cook faster and you’ll pull it out too early.
- Prep Time: 15 minutes
- Cook Time: 30 minutes
- Category: Dessert
- Method: Baking
- Cuisine: American
Nutrition
- Serving Size: 1 slice
- Calories: 485
- Sugar: 58g
- Sodium: 285mg
- Fat: 18g
- Saturated Fat: 9g
- Unsaturated Fat: 8g
- Carbohydrates: 82g
- Fiber: 4g
- Protein: 6g
- Cholesterol: 65mg
Why These Ingredients Work
Okay, so I used to just throw ingredients together and hope for the best. Then my sister-in-law explained why this stuff works and now I feel like a genius. That cocoa powder? It needs help to taste really chocolatey, which is where the coffee comes in. Don’t worry – it won’t taste like coffee at all, just makes the chocolate pop.
The hot water thing blew my mind when I first heard it. Most recipes want everything cold, but hot water actually wakes up the cocoa and creates steam that keeps the cake soft. Plus oil instead of butter means it stays good longer. I learned this the hard way after making butter cakes that turned into rocks after two days.
Essential Tools and Equipment
Two 9-inch cake pans, a big mixing bowl, some kind of mixer (I use my hand mixer), measuring stuff, a whisk, cooling racks, and something to spread frosting with. Oh, and don’t forget to grease those pans – nothing worse than a cake that won’t come out.
Step-by-Step Instructions
Step 1: Preheat & Prep Your Pans
Turn your oven to 350°F. Grease your pans with whatever you use – I like butter, then I dust them with cocoa instead of flour so they don’t look all white and weird.
Step 2: Mix Those Dry Ingredients
Dump all the dry stuff in your biggest bowl and whisk it up. Make sure there aren’t any cocoa lumps because those turn into bitter surprises later.
Pro Tip: Taste your cocoa before you use it. Old cocoa tastes like dirt and will ruin your whole cake.
Step 3: Add the Wet Ingredients
Pour in the milk, oil, eggs, and vanilla. Mix it on medium until it looks like normal cake batter. Nothing fancy here.
Step 4: The Magic Boiling Water Step
This is where it gets weird. Turn your mixer down low and slowly pour in that boiling water. The batter’s going to get really thin and you’re going to think you screwed up. You didn’t.
Pro Tip: Go slow with the water so you don’t make scrambled eggs. Keep that mixer running the whole time.
Step 5: Bake to Perfection
Split the batter between your pans – it’ll be really liquidy, that’s normal. Bake for about 30-35 minutes. Stick a toothpick in the middle and if it comes out clean or with just a few crumbs, you’re done.
Step 6: Cool Completely
Let them sit for 10 minutes, then flip them out onto racks. I know you want to frost them now but don’t. Hot cake melts frosting and you’ll hate yourself.
Step 7: Make That Dreamy Frosting
Beat your butter until it’s fluffy, then add everything else and beat the crap out of it until it’s smooth. If it’s too thick, add more cream. Too runny? More powdered sugar.
Step 8: Frost and Serve
Bottom layer on your plate, frosting in the middle, top layer, then frost the whole thing. Don’t stress about making it perfect – homemade should look homemade.

You Must Know
That thin batter is going to mess with your head. Every fiber of your being will want to add flour. DON’T. This is exactly how it’s supposed to be. Also, make sure your butter is actually soft – I poke it and if my finger leaves a dent, it’s ready.
Personal Secret: I always make way too much frosting on purpose and keep the extra in the fridge. When my kids have bad days, I put it on graham crackers or just let them eat it with a spoon. Life’s short.
Pro Tips & Cooking Hacks
Here’s what I wish someone had told me when I started making this cake. That espresso powder isn’t optional – it makes chocolate taste more like itself without adding coffee flavor. When you measure cocoa, don’t pack it down or you’ll get way too much and your cake will be bitter as hell.
Also, smell your vanilla before you use it. Cheap vanilla tastes like rubbing alcohol and will mess up your whole cake. If your frosting looks too thick, add cream bit by bit. If it gets too thin, stick it in the fridge for a few minutes then beat it again. And here’s something nobody tells you – check doneness in the center, not the edges. Edges always cook faster and you’ll pull it out too early.
Flavor Variations & Suggestions
This cake is like a blank slate. Want coffee flavor? Add more espresso powder to everything. My mom likes mint so I put peppermint extract in the frosting and crush up some thin mints on top.
For fancy dinners, I brush the layers with coffee or bourbon before frosting. Sounds weird but it’s amazing. Kids love mini chocolate chips mixed into the batter. You can also ditch the buttercream and do cream cheese frosting if you want less sweet, or go nuts with chocolate ganache if you want more sweet. Berries on top make it look like you actually know what you’re doing.
Make-Ahead Options
I’m not great at planning ahead but this cake forgives that. The layers keep for days wrapped up on the counter. The frosting actually gets better overnight in the fridge – just let it come back to room temperature and beat it up again before using.
Everything freezes great too. I wrap the layers separately and freeze the frosting in a container. When I need cake fast, everything thaws in the fridge overnight. I’ve even frozen the whole finished cake for parties – just wrap it really well and thaw it slowly. Saves my butt when I remember someone’s birthday at the last minute.
What to Serve With Easy Chocolate Cake
This cake is rich so it goes great with stuff that cuts through that. Fresh berries are obvious but good. Vanilla ice cream is classic. Coffee makes the adults happy, milk makes the kids happy.
For parties, I put out different toppings – whipped cream, berries, chocolate chips, caramel sauce – and let people go crazy. Makes everyone feel fancy without me doing extra work.
Allergy Information
This has the usual suspects – wheat, eggs, dairy. But it’s super easy to swap things out. I use gluten-free flour for my celiac friend and it works fine. Plant milk instead of regular milk, vegan butter in the frosting for dairy-free. For eggs, I use applesauce – about ⅔ cup instead of the two eggs.
Storage & Reheating
Keep it covered on the counter for a few days, fridge if it’s longer than that. If you put it in the fridge, let it sit out for a bit before serving or it’ll be too firm. You can wrap slices and freeze them – they thaw pretty quick at room temperature.
This cake actually gets better after the first day. All the flavors settle in and it gets even more moist. So don’t stress about making it the day you need it.
FAQs
Can I make cupcakes instead?
Yeah, just use cupcake liners and bake for about 18-20 minutes. Perfect for school parties when you need individual servings.
My frosting came out too thick, what now?
Add cream one tablespoon at a time and beat it in. Don’t dump it all at once or you’ll overshoot and make it too thin.
Can I skip the coffee powder?
You can, but the chocolate won’t taste as good. It’s not coffee-flavored, it just makes chocolate taste more chocolatey. Trust me.
Why does the batter look so weird and thin?
Because it’s supposed to! That’s what makes it so moist. Every instinct says it’s wrong but it’s actually perfect.
Can I make this without eggs?
Yep, use about ⅔ cup applesauce instead. It’ll be a little different but still really good.
💬 Did you try this? Tell me how it went! I always want to know what worked and what didn’t – helps me help other people make better cake.

